Plain AST Editor: Getting Started
This is a short guide which explains how to start and configure the editor. In addition a small example shows how to create and edit an AST.
- Start and Configuration
- Creating an AST
Starting and configuring the plain AST Editor is different for the Swing version and the Eclipse plugin.
The editor is started by either double-clicking astcentric-editor.jar (if file type
.jar is associated to the Java VM) or by invoking the command
prompt> java -jar astcentric-editor.jar
First the following dialog pops up:

Here at least the Domain has to be specified. Enter the Internet domain to which you or your work belongs (e.g. mycompany.com). The Creator field is already filled with your user login name. It has to be unique inside the team of developers editing the same ASTs. The ASTs you will create will be stored in the Base Directory. All AST files (file type .ast) in this directory and all its subdirectories are editable.
After clicking on the OK button the AST creation preferences will be stored permanently and the main window of the editor appears. The menu item Help|Show Creation Preferences... will show again your preferences in a message dialog.
Before you can create or edit an AST you have to specify the Domain. Choose the menu item Window -> Preferences... and select AST Preferences:
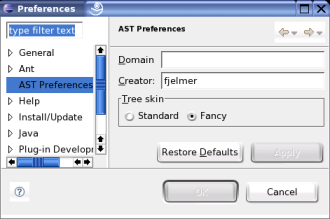
Enter the Internet domain to which you or your work belongs (e.g. mycompany.com). The Creator field is already filled with your user login name. It has to be unique inside the team of developers editing the same ASTs.
Domain and Creator can also be specified individually for Java projects by choosing the Properties item from the context menu of the project and selecting AST Editor Properties. In addition the folder of editable ASTs and archive files or folders with read-only ASTs can be chosen.

By default editable ASTs can be everywhere in the project. In the case of a Java project where Java files and class files are not in the same folder it is recommended to choose as the folder for editable ASTs either a Java source folder or a folder not in the hierarchy of Java source folders. Otherwise AST files appears twice which may lead to some strange effects.
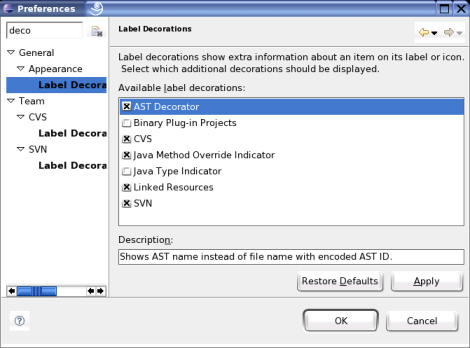
Because the name of an AST file is just the encoded AST ID followed by .ast it is difficult to see in the Package Explorer or Navigator which AST is stored in the files. By choosing the AST Decorator on the Label Decorations page in the Preferences dialog the AST name will be shown instead of the file name:
Creating a new AST differs slightly between the Swing version and the Eclipse plugin.
A new AST will be created by choosing menu item File -> New AST... or hitting CTRL-N. The following popup dialog appears:
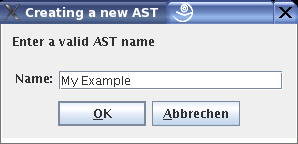
A valid AST name can be any text with at least one printable symbol. Leading and trailing space characters will be removed.
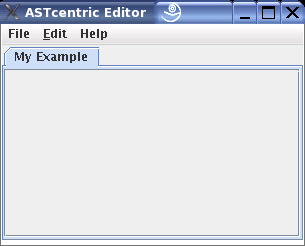
After you have pressed the OK button an empty tab with that name appears in the editor:
A new AST will be created by choosing menu item File -> New -> Others... and select AST Editor -> AST:

On the next page enter a valid AST name:

After clicking the Finish a new editor tab with the AST name will appear.
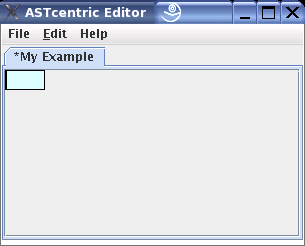
The first node is created by the menu item Edit -> Create Child or the key stroke CTRL-ENTER:
 |
 |
| Swing | Eclipse |
The node is represented by a rectangle. Also note the star symbol before the AST name. It means that the AST has been changed but not saved.
In general CTRL-ENTER creates a child node for the highlighted node. A sibling node is created by ALT-ENTER.
When you hit the N-key on your keyboard the following dialog pops up:
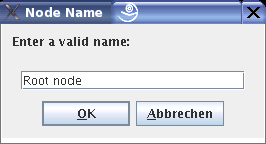
The name of a node can be any text with at least one printable character.
It will appear in the node rectangle in bold letters.
A node may refer another node. To change the reference of a node hit the R-key. A list of possible nodes pops up underneath the highlighted node:

Entering some symbols in the field above the list will filter the list. With the UP and DOWN cursor key a node can be selected. When the ENTER key is hit a link to the chosen node will be established.
Each node can have a typed value. This value can be edited by the key stroke V. A dialog pops up where you can choose the type and enter the value:
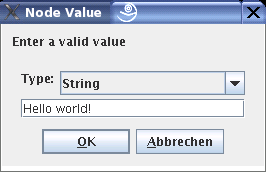
In order to become referable for nodes of other ASTs a node has to be exported. This is done by the E key. Only named nodes can be exported. The name of an exported node appears in green:

A node and all its descendants can moved to another position in the tree by three steps:
- Mark with key stroke M the highlighted node (currently this isn't made visible, sorry).
- Highlight the node to which the marked node should be moved.
- Press O key. A dialog pops up where you have to choose the exact location: The node to be moved can appear before or after the highlighted node or it becomes the first child node of the highlighted node.

|


